
Fix a leaking close coupled toilet cistern is a straight forward job, so don’t panic.
One quick note, if you flush your toilet again right now you will realise it only leaks when you flush.
There is no need to worry, it won’t flood your room.
The siphon (the large plastic part in the cistern) won’t allow any water to flow unless the button is pressed.
As long as you don’t press the button you will be ok.
So take a deep breath and lets get some tools together.
Tools Needed For A Leaking Close Coupled Toilet Cistern
A flat and a cross head screwdriver, an adjustable spanner and a large pair of pliers or a toilet siphon spanner.
If you haven’t already got the siphon spanner or the pliers, then It’s definitely worth investing in the pliers instead of the siphon spanner.
I say this because you may never use the spanner again, which makes it a waste of money, where as the pliers will always come in handy.
The plumbers favorite pliers are the Bahco 8231 Slip Joint Plier, I will leave a link to Amazon, so you can check them out.
Important – Isolating The Water Supply
Before you venture into the unknown, the water supply needs to be isolated from the toilet.
If your lucky, the water feed to toilet should have an isolation valve fitted.
Using your flat bladed screwdriver, turn the isolation valve from vertical to horizontal.

If you don’t have a isolation valve for the toilet you will have to turn the main water supply off at the stop cock.
Once you have isolated the water supply give the toilet a flush to empty the cistern and to make sure the water supply is no longer filling the cistern back up.
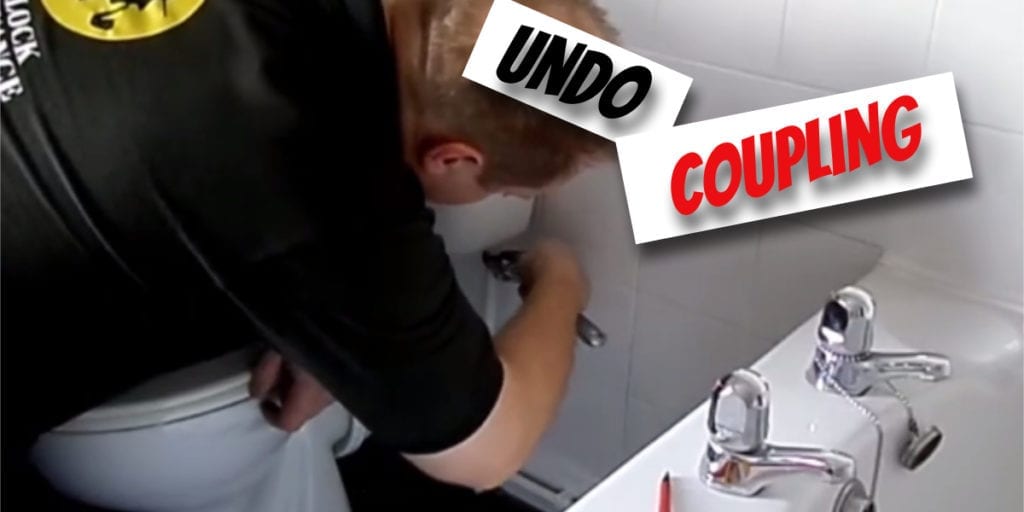
Remove The Water Supply Coupling
Place a towel around the base of the water pipe you have just isolated.
This will help catch the water that is sitting in the pipe.
Using your adjustable spanner, turn the coupling that is attached the cistern anticlockwise.
Don’t be afraid of the water that drains out, as long as you isolated the supply you will be OK.
Removing The Cistern
Give the toilet a flush.
Next, lift off the cistern lid and disconnect the cable attached to the flush button (if there is one).
You will now see some residual water at the bottom of the cistern. This water won’t go anywhere so don’t panic.
You can either soak up the water with a towel or use a wet and dry vacuum OR if your feeling strong, pour it into the bath once you have the cistern disconnected from the bowl.
The cistern is clamped to the bowl with two bolts and butterfly/wing nuts, which are located underneath the cistern.

These butterfly/wing nuts can be tough to loosen or if your lucky they may just loosen with a twist of the wrist.
If they are tough to loosen, use a pair of pliers and clamp the nut, turn anti clockwise.
Once the nuts are off, grasp the cistern by the sides and gently lift it off the bowl.
If you kept the water in the cistern, gently lift it over the bath and pour the water out.
Gently turn the cistern upside down and rest it in the bath. This will allow any excess water to drain out of the siphon (the flush part).
Inspect and Clean
From my experience you should already see how rusty the coupling plate is.

And if your lucky, like I was (not), it will be plastered in silicone sealant or some kind of mastic.
You should also notice that the rubber donut/black seal either looks perished or nearly flat and out of shape.
Moving over to the bowl, if your lucky its clean, if not give the area a good clean and dry well.
If your met with what I was, you may have to use a silicone sealant remover.

Silicone sealant removers are pretty simple to use, most have an applicator brush fitted to the underside of the lid.
Just dip, paste, wait (usually 15 minutes) and remove.
How to Measure For New Closed Coupled Toilet Cistern Kit
Now the bowl is all clean and free from silicone, grab a towel and place over the toilet seat.
Pick up your cistern and place it back down on the toilet seat with the base facing you.
Using a tape measure, measure the inside diameter of the siphon pipe.

Just a quick note… When measuring pipe, YOU SHOULD ALWAYS measure the INSIDE DIAMETER. This will save any confusion when ordering or asking for a replacement part.
Usually the pipe will measure 1.5 inches, which is becoming more standard with today’s toilet siphons, but 2 inch siphons can found too.
Either visit your local hardware store, or if it’s easier, order online from Amazon.
Visiting the hardware store, ask for a “close coupled toilet cistern kit” and let them know which size you need.

Or visit Amazon for the 1.5 inch closed coupled toilet cistern kit, or the 2 inch close coupled cistern kit.
Fitting The New Closed Coupled Toilet Cistern Kit
Taking a pair of grips or a siphon spanner, remove the plastic nut.
It is best to hold the siphon (to stop it turning) while you loosen the nut. Once the nut is loose undo the rest with your hand.

You now have access to the plate, which should slide off easily.
These plates are cheaply made and always rust due to condensation that forms between the bowl and cistern.

Next (I call this my insurance policy) Grab a pot of plumbers Mait.

Plumbers Mait creates seals around taps and drains and anything else plumbing related. It gives you a watertight seal if tightening just isn’t enough.
Even if you don’t ever use it again, I would totally recommend it for this job.
Scoop enough out to make a ping ball size ball.
Once rolled into a ball, begin to roll it down until it resembles a peice of string.
Place the plumbers mait on the mounting face of the plate (the side that will be against the cistern), around the edge of the hole.

Press the plate against the cistern until it sticks, then slide the siphon back through the hole and start to screw the plastic nut back on, keep turning the nut until the nut is hand tight.

Once hand tight, hold the siphon tightly and then finish off the tightening with your grips, or spanner. Don’t go mad, just nice and tight.
Grab the doughnut washer, place over the pipe flat side first and slide onto the pipe until the washer is practically flush against the plate.

Refitting The Toilet Cistern
Slide the bolts into the slots on the mounting plate, then carefully pick up the cistern and place on top of the toilet bowl making sure the bolts slide into the holes on the toilet bowl.

Screw the butterfly/wingnuts with washers onto the bolts, tighten these nuts up evenly to make sure even pressure is applied to the new doughnut seal.

Once the cistern is nice and tight to the toilet bowl, refit the water supply back to the cistern and remount the toilet back to the wall.
Turn on the isolation valve, check for any leaks around the water supply nut, if there is any, turn off the water, and wrap some PTFE tape around the thread (3 times) and refit.
Leave the the toilet to fill up with water, then flush.
While the toilet is flushing check around the base of the cistern to see if there is any sign of leakage. If there is, tighten the wing nuts up a little more.
Check again with another flush, Sorted! No more leaking close coupled toilet cistern!
Another job done and some money saved!
Did This Post Help?
Hopefully your not afraid of fixing a leaking close coupled toilet cistern now, if it still feels daunting, just have a good read again and watch the video as you go, pausing it between each step.
Keep in mind, once you master this repair, the same process is also used to remove and repair the toilets siphon when it fails to flush.
Yes, a aha moment 🙂 I can hear you 😉
Each and every week I put my heart and soul into providing you with great content to help with any DIY jobs around the home.
If you think this post could help someone you know, please share.

Other Helpful Maintenance Articles
How To Fix A door Handle That Fell Off – There are many ways to fix a door handle that fell off, but there is one way that always works.
How to Fix a Punched Hole in The Wall – Don’t panic…Fixing a punched hole in the wall is easy if you follow these steps.
Refelting a Summer House Roof – Refelting a summer house roof is quite a big job but its definitely something you don’t want to put off, Follow my step by step guide.
I found the cistern was silicon sealed to wall tiles and difficult to remove. A Japanese saw cut the sealer with ease
I’ve used my wood saw a few times, but I think I will invest in a Japanese saw now John and keep it just for this, thanks 😉